How to use an Airbrush: Holding an airbrush properly [Airbrush Lesson 1]

Airbrush Lesson 1 : How to Hold Your Airbrush
This first lesson will teach you how to hold your airbrush properly.
I suggest that you use some sort of inexpensive support to practice on at first (like newsprint) or even some large sketch pads. Make sure you buy large ones as you want plenty of space to practice.
Once you will get the hang on it, you will be able to move on and use better quality.
As for paint, don’t use craft paint but rather use airbrush ready paint like Createx airbrush paint, Golden airbrush colors or Dr ph martins airbrush paint. It will make your life easier.
Material Needed for this series of Airbrush lesson:
- A dual action airbrush
- An airbrush compressor or a CO2 tank for air source
- Airbrush paint like Iwata Comart airbrush paint, Createx paint, Dr ph martins airbrush paint or Golden airbrush colors.
- An easel if you want to practice standing up.
How to hold an airbrush
Don’t be intimidated by the airbrush. If you practice the right way, you will be able to start using an airbrush in no time. It is crucial that you develop good habits from the start when you begin to use an airbrush.
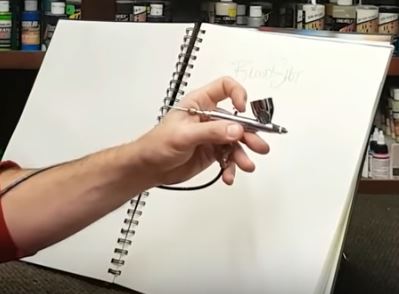
First, it is important that you learn to hold the airbrush the right way. It doesn’t matter if you are right-handed or left-handed.
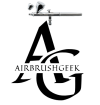
Hold the airbrush in your hand just like a pen or a pencil, your thumb and middle finger are for support on the stem, and the index on the trigger finger form a pyramid .
The key thing is to be completely relax, and let the airbrush fit comfortably into your hand.
The index finger on the trigger forms a
pyramid which bends inward
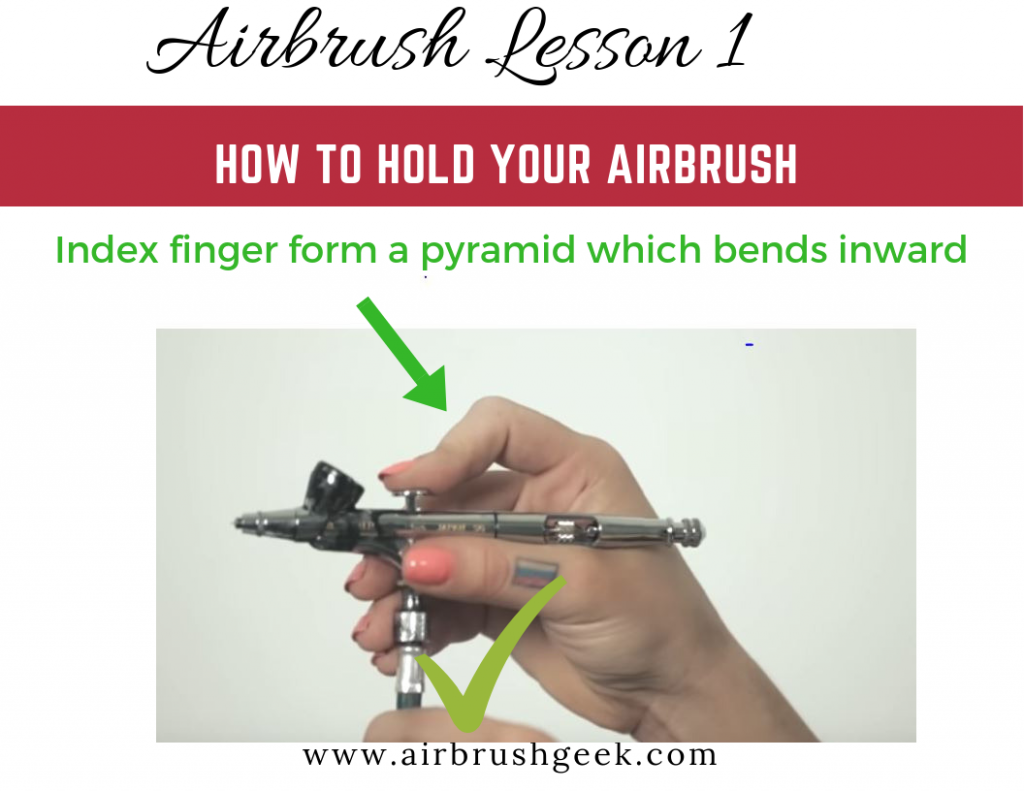
It’s important not to let the index
finger being out because the finger must
slide with the trigger not pull it
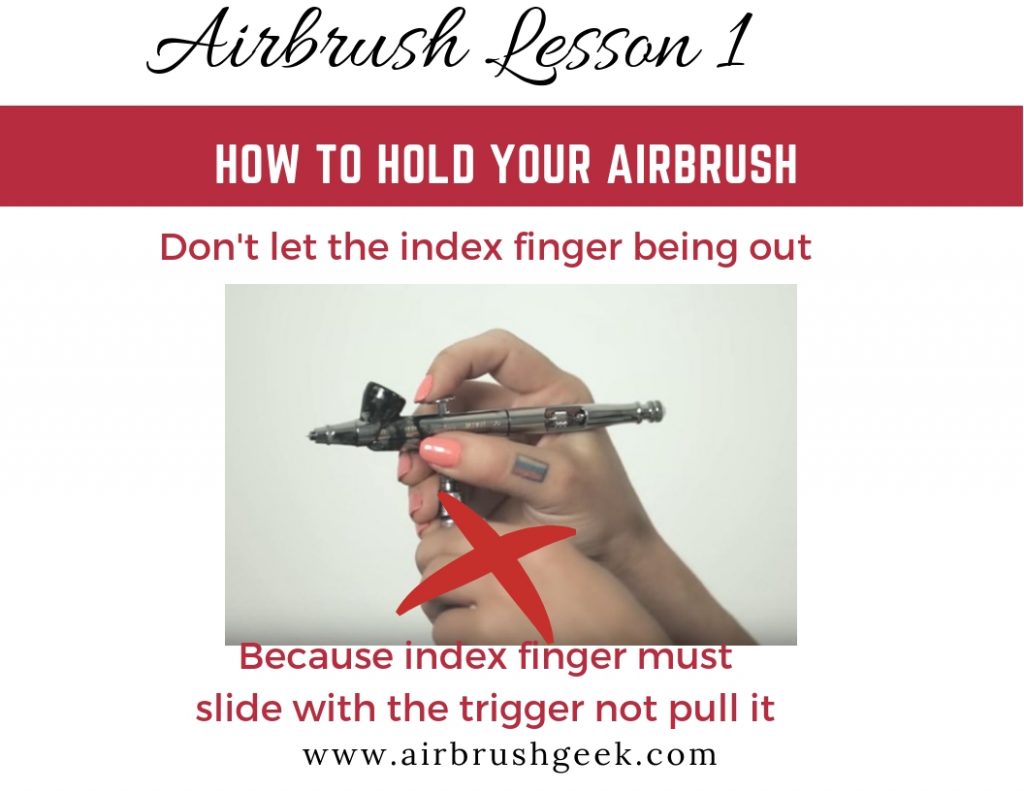
Make sure the thumb is not parallel to the axis of the air hose.
What to do with your other hand?
- If you coordinated enough and manage to airbrush using only one hand, you can use the other free hand to hold stencils or masks…or maybe drink a cup of tea!.
- If you are using and airbrush with a large bottom feed cup, you could use your other hand to hold the cup to give an extra support and help you a bit when you start to get tired.
- Some people use their free hand to hold the wrist of the airbrushing hand.This will improve the stability when airbrushing
- Another way to improve the stability is use your free hand to support the airbrushing hand:

How to hold your Airbrush: The support hand
- If the air hose gets in the way, you could wrap it around your airbrush hand
How to hold your airbrush: wrapping the hose around your arm
How to control a double action airbrush
With a double action airbrush, the airflow is controlled by pressing the airbrush trigger and the paint flow is controlled by pulling the same trigger back. The more you pull the trigger back, the bigger the paint flow is, making the spray pattern wider.
![How to use an Airbrush: Holding an airbrush properly [Airbrush Lesson 1]](https://airbrushgeek.com/wp-content/uploads/2018/02/Double-Action-Airbrush-1024x791.png)
Set the air pressure on your compressor to 25 PSI.
Start by pressing down to trigger to release air, then slowly pull the trigger back to release the paint.
IMPORTANT: keep pressing the trigger (releasing air) until you cut of the paint release by moving the trigger back to the starting point. This will prevent your airbrush from clogging by leaving paint inside the needle.
Also, don’t try to control the air pressure by moving your index finger up and down on the trigger. Remember that you are pressure is set to around 25 PSI on your compressor.
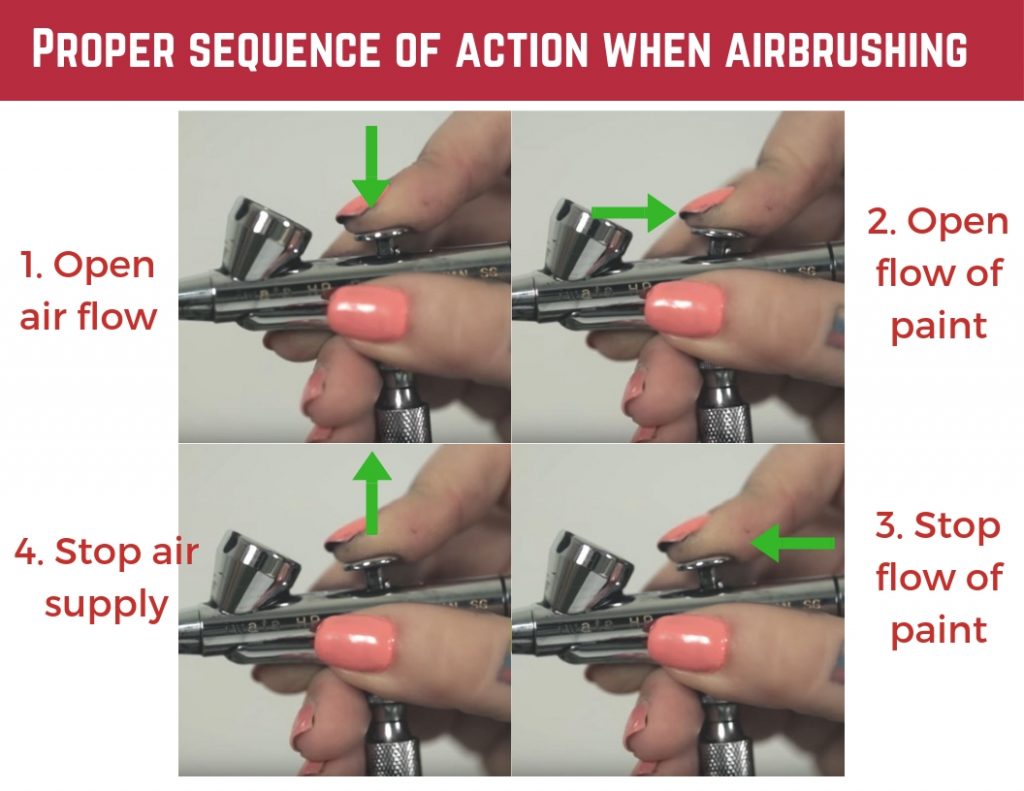
Proper sequence of action when double actioning:
1 Air on (Press the trigger down and keep it down up to sequence number 6 )
2 Start moving (Always keep moving the airbrush)
3 Paint on (pull the trigger backwards and keep moving)
4 paint off (push the trigger forward, still keep moving)
5 move away (move airbrush away from the artwork)
6 air off (trigger up)
Proper sequence of action when airbrushing
Airbrush Practicing:
It is important to practice, even if you are an experienced airbrush artist. before going ahead with your piece of artwork, it is a good idea to warm up a bit and perform some basic airbrush exercises.
If you keep practicing over and over again some basic airbrushing exercises, you will notice that they will become second nature over time and you will be able to do them without thinking.
- The distance from the tip of the airbrush to your artwork: the further away you are,the more diffused and lighter your spray pattern will be. The closer you are , the thinner the lines will be and the less paint volume you will need.
- The speed at which you are moving across your work. The slower you work, the more concentrated the paint will be.
- The amount of paint coming out of the airbrush. The more you pull the trigger, the more paint is coming out.
- The Air pressure use to spray the paint
Practices lines
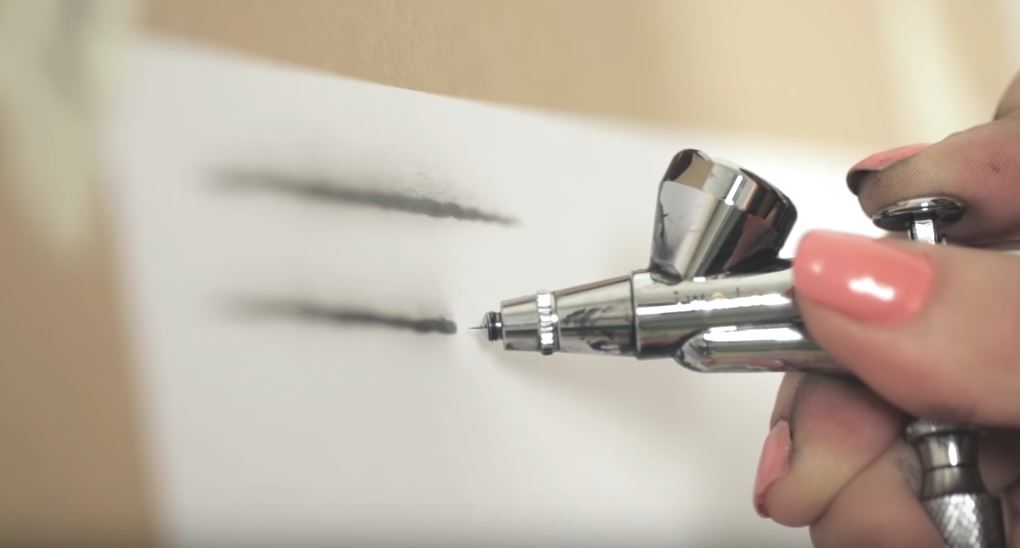
Open the air, pull the trigger slowly, fix
it ,return it back and close the air.
At first, you might draw lines that looks more like electrocardiogram than straight lines. This is perfectly normal because you are not used to work free hand at slow speed. With a bit of practice,this discomfort will pass and your muscles will get used to it,the arm will stop shaking. The lines will be smoother and smoother as you go.
![How to use an Airbrush: Holding an airbrush properly [Airbrush Lesson 1]](https://airbrushgeek.com/wp-content/uploads/thumbs_dir/How-to-clean-your-airbrush-qkvl8sre6wo7kjt044l05vvqvuostcvg0fzkxnn7ek.png)
![How to use an Airbrush: Holding an airbrush properly [Airbrush Lesson 1]](https://airbrushgeek.com/wp-content/uploads/thumbs_dir/how-to-airbrush-fine-lines-qkvlat4yt5faeivvdhv9zvm8mis2a1urye7yvynw3g.png)


