How to Airbrush Dots [Free Airbrush Lesson 2]

In this second free Airbrush Lesson, we are going to see how to airbrush dots and lines. Those are some of the fundamentals you need to learn in order to get comfortable using an airbrush. Practicing those following exercise over and over again will help you get the coordination you need when working with an airbrush. You will need concentration and a good bit of patience but I can guarantee you that the work you put in those exercises will pay off eventually.
Airbrushing Dots:
- The distance from the tip of the airbrush to the paper: the further away you are,the more diffused and lighter your spray pattern will be. The closer you are , the thinner the lines will be and the less paint volume you will need.
- The speed at which you are moving across your work. The slower you work, the more concentrated the paint will be.
- The amount of paint coming out of the airbrush. The more you pull the trigger, the more paint is coming out.
- The Air pressure use to spray the paint
Distance & Paint density
The spray of an airbrush has a cone shape. When airbrushing a constant level of paint , the distance you hold the nozzle of the airbrush from the artwork will have an impact on the density of the paint. The closer you are from the artwork, the more concentrated the paint will be. On the contrary, the farther you are from the artwork, the more diffuse the paint will be.
![How to Airbrush Dots [Free Airbrush Lesson 2]](https://airbrushgeek.com/wp-content/uploads/2019/03/distance-paint-density.jpg)
Practicing the Dots
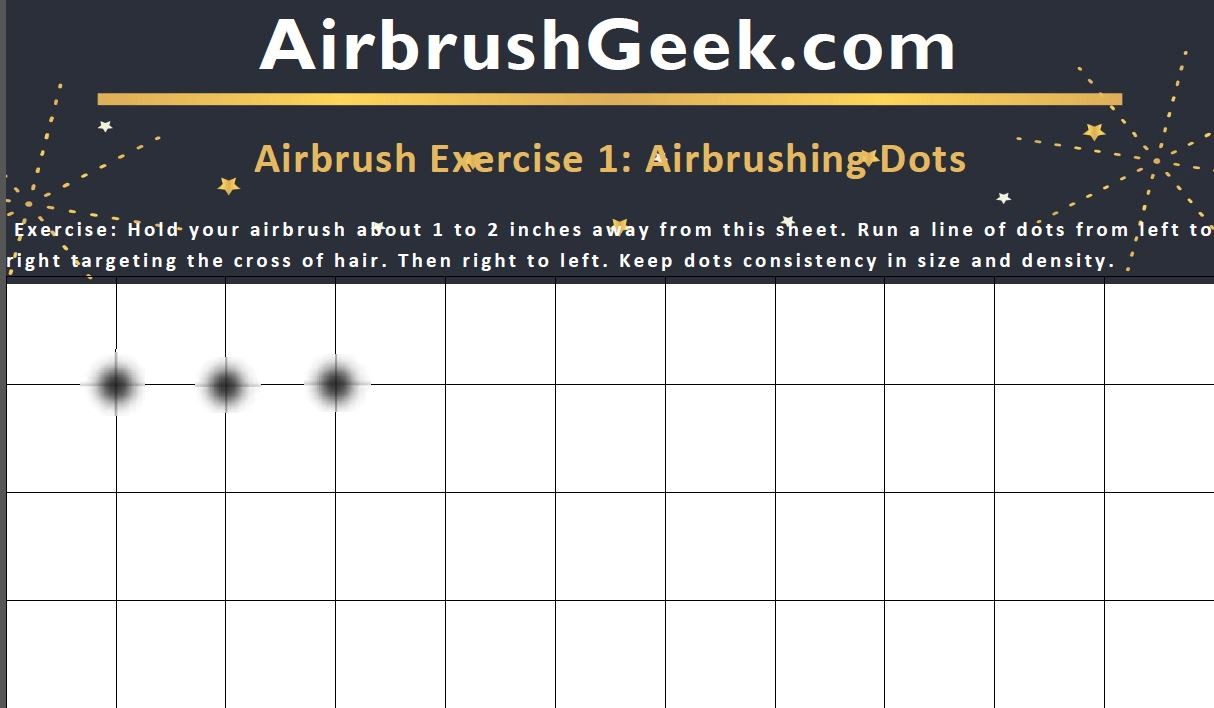
For this exercise, you can download the Airbrush Exercise 1 practice sheet. . The dots is one of the basic exercise that you need to do in order improve the way you control your airbrush.
The distance between you sheet and the nozzle should be between 1 or 2 inches. You can use you free hand as indicated in the airbrush lesson 1 to support your airbrushing hand. That way, it will be easier to keep the distance the same all the time. Try to target exactly the point were the lines are crossing each others.
Run a line of dots from left to right, and then from right to left. Always keep the dots consistency in size and density. You can, every 2 lines, increase the size of the dots, but always keep the dots size the same for the entire line. To do so, just increase the distance a little bit. Remember that the spray pattern will become more diffuse and light. You can compensate by spraying a bit longer.
This is a very good exercise for your hand-eye coordination. You will see how good you are at aiming a specific target. Print several of the Airbrush Exercise 1 practice sheet and practice , practice, over and over again.
Set the air pressure on your compressor to 25 PSI.
Start by pressing down to trigger to release air, then slowly pull the trigger back to release the paint.
REMEMBER: Keep the air on! keep pressing the trigger to release the air until you cut of the paint release by moving the trigger back to the starting point. Work slowly and to avoid being hesitant.
Sequence of action with a dual action airbrush when airbrushing dots:
1 Air on (Press the trigger down and keep it down up to sequence number 6 )
2 Aim at your target (target the points were lines are crossing)
3 Paint on (slowly pull the trigger backwards )
4 paint off (When you are happy with the dot size and consistency, push the trigger forward)
5 move away (move airbrush away from the paper)
6 air off (trigger up)
airbrushing dots
![How to Airbrush Dots [Free Airbrush Lesson 2]](https://airbrushgeek.com/wp-content/uploads/thumbs_dir/how-to-airbrush-lesson-1-qkvlakof3n3pi185qw7mvfr3a1xrcrx6x8clkh0fng.png)
![How to Airbrush Dots [Free Airbrush Lesson 2]](https://airbrushgeek.com/wp-content/uploads/thumbs_dir/How-to-airbrush-thin-lines-feature.-2png-qkvlbkeabcglr7s9ybngi6qlup1ph9uzq551szjh30.png)


